EveryonePrint is for printing from student owned laptops, PCs, tablets, phones etc. over the Wifi network.. It uploads files from laptops etc. into the existing Pcounter billing system & printers..
If you are printing from a college owned PC on the wired network, you do not need to use EveryonePrint, – in that case follow the PcCounter printing tutorial instead.
Click on aplicable device:
Printing from Windows laptop to student printers via EveryonePrint website:
Your laptop must be connected to the college wifi network. For details see
Eduroam
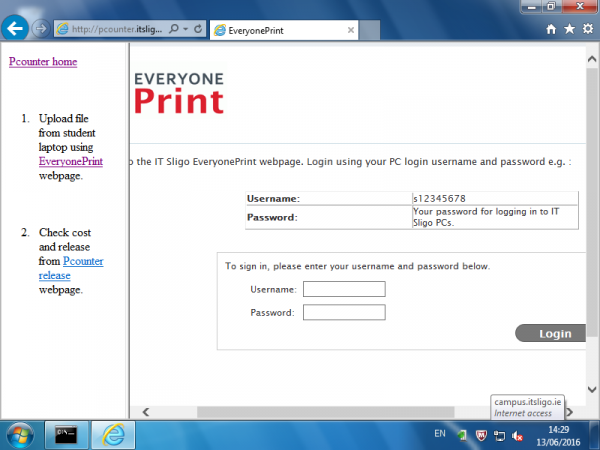
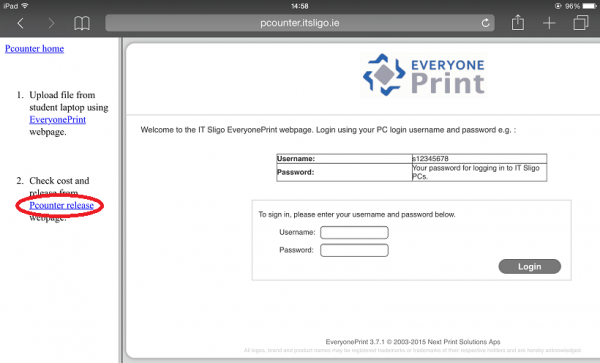
Open the EveryonePrint website at EveryonePrint
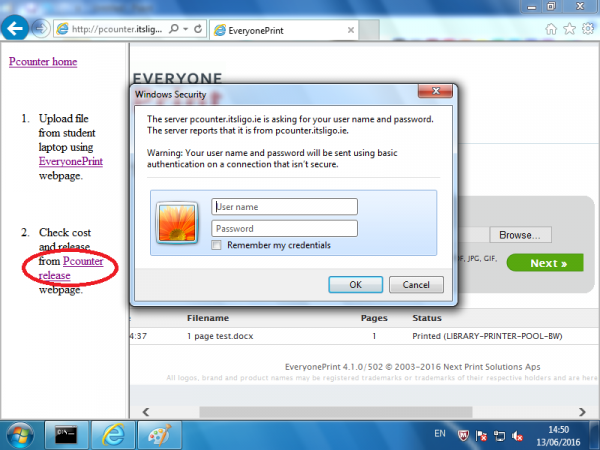
Log in using the same username & password you would use to log in to a college PC e.g. s12345678 and your PC login password.
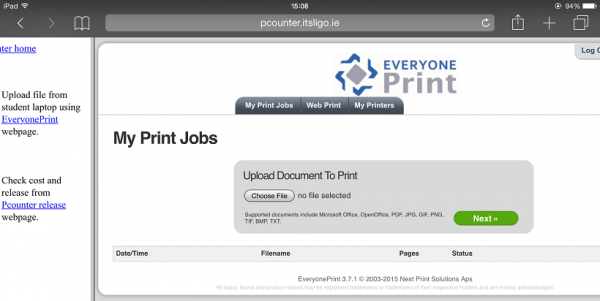
Once logged in to the EveryonePrint webpage you should see the browser upload window:
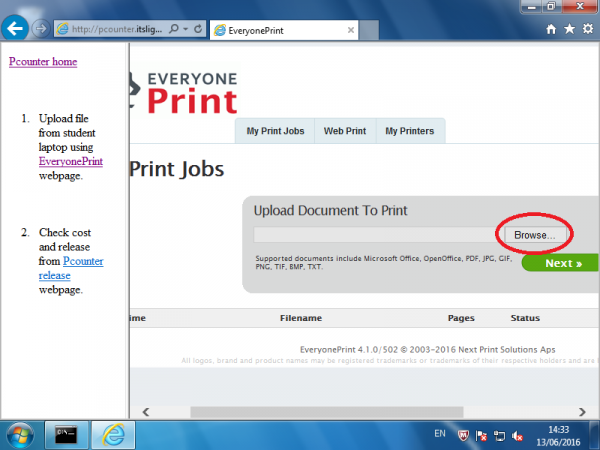
Browse to the file you would like to print, and click “Next”.
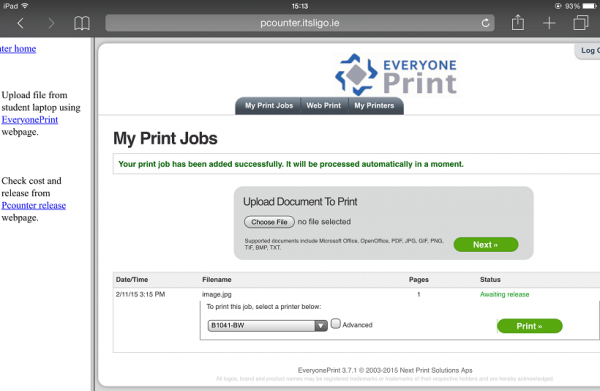
The filename should appear in your list as below, with status “Awaiting processing”, “Processing”, then “Awaiting release” while the server converts it from Word / Excel etc. format to a printing format.
This may take some time, depending on the size of the file, and the volume of users.
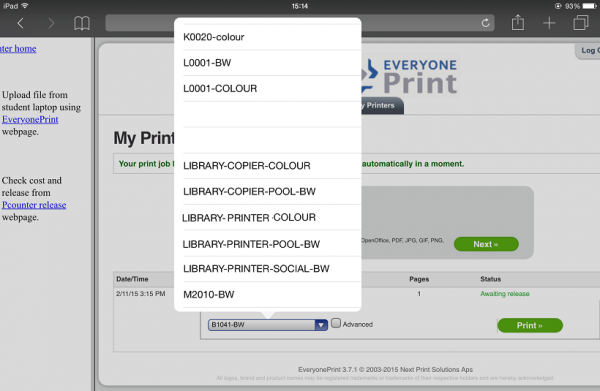
Choose a printer from the drop down list, as below.
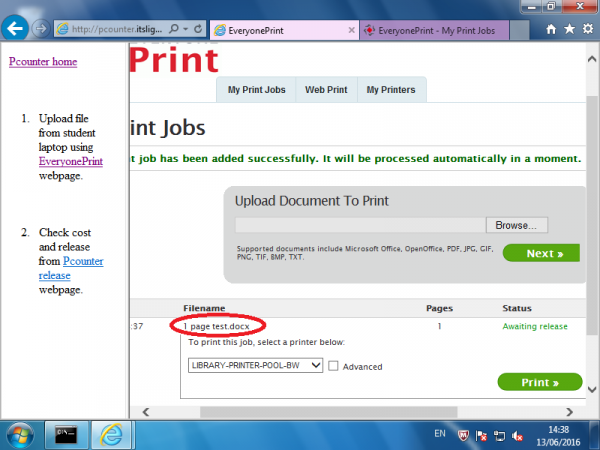
After choosing the printer, Click “Print” .
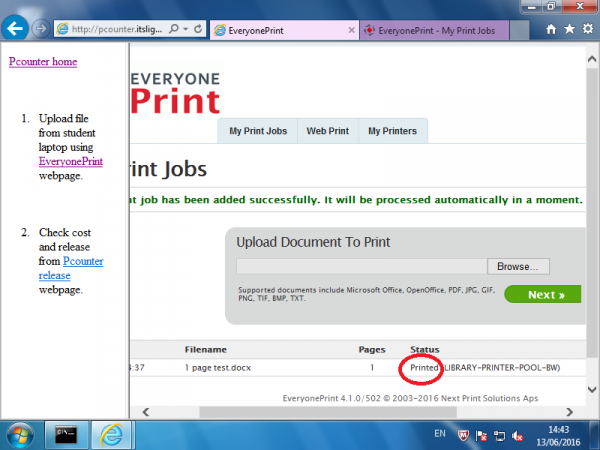
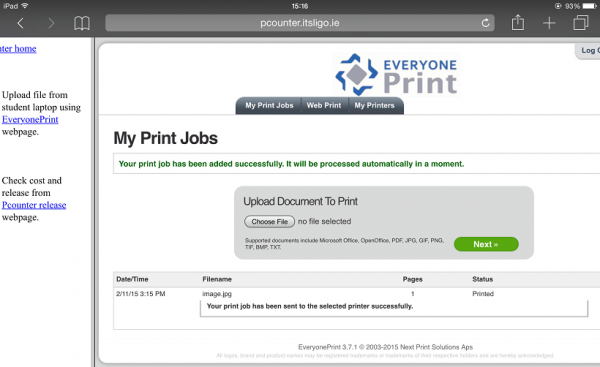
NOTE: A message will appear that “Your print job has been sent to the selected printer successfully.” and the print job will change to status “Printed” (as below), but you will need to release it from the billing system before it will actually print.
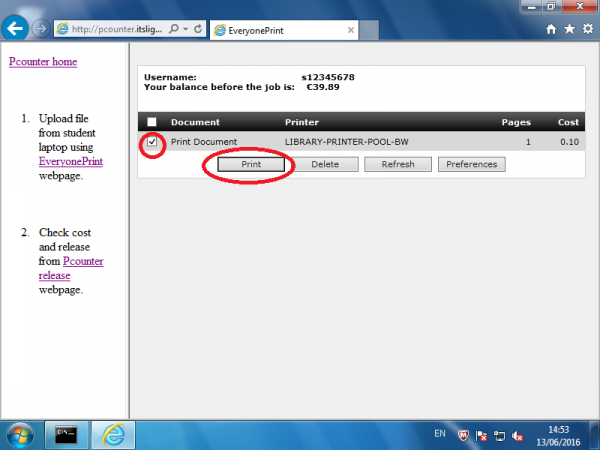
To check the cost, click “Pcounter release” link in step 2 of the screenshot above.
A login screen will appear. Enter your username and password in the format:
- User: campus\s12345678
- Password: Your login password for college PC’s
A screen like below should appear. If the filename, printer, pagecount & cost are what you expect, select the file, and click “Print”.
The file should then print from the selected printer, and your credit will be deducted.
If nothing prints, please check the FAQ first and inform IT Services student helpdesk.
Printing from Mac Laptop / iPad / iPhone to student printers via EveryonePrint website:
Your iPad / iPhone must be connected to the college wifi network. For details see: Eduroam
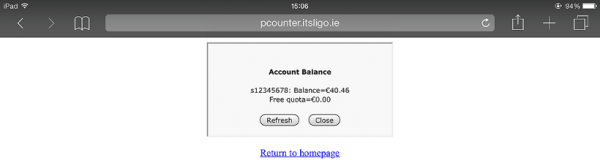
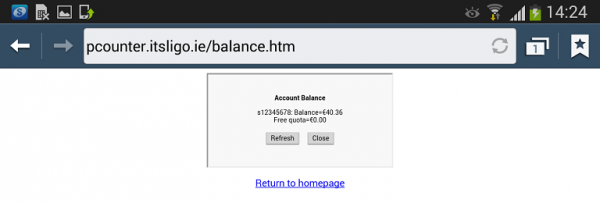
Check that you have enough credit in your student account at the Pcounter webpage Your Balance
When “Authentication Required” pcounter.itsligo.ie, appears log in with your S number & PC login password. Make a note of your balance for comparison in step 8. :
Open the EveryonePrint webpage at EveryonePrint
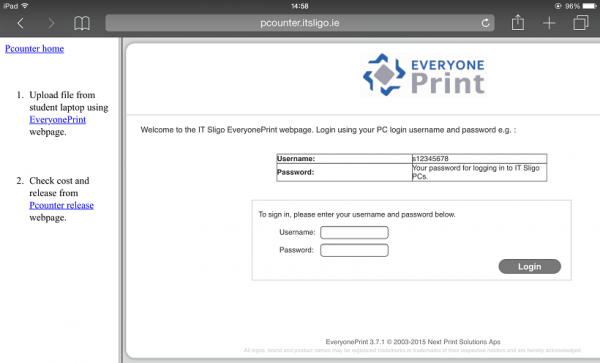
Log in using the same username & password you use to log in to a college PC e.g. s12345678 and your PC login password.
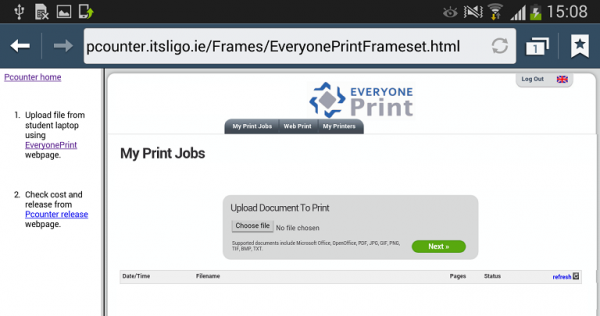
Once logged in you should see:
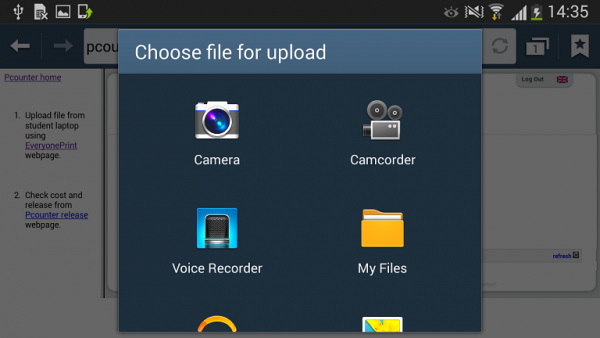
Press [Choose File] and the Safari browse menu will appear i.e.
“Take photo or Video”
“Photo Library”
Apple apps cannot view the whole file system. If you want to print a webpage choose “Web Print” in step 4 above.
Select “Photo Library” and then the picture or screenshot file you would like to print, and click “Next”.
The filename should appear in your list as below, with status “Awaiting processing”, then “Processing”, then “Awaiting Release” while the server converts it from jpg etc. format to a printing format.
This may take some time.
When the status of the print job changes to “Awaiting release”, choose a printer from the drop down list, as below.
After choosing the printer, press “Print” .
NOTE: A message will appear that “Your print job has been sent to the selected printer successfully.” and the print job will change to status “Printed” (as below).
The file will not print from the printer until you do step 2 in the LHS pane.
Click “Pcounter release” in step 2 as below, login to the Pcounter webpage, check your balance, select your file, check it’s pagecount, cost and destination printer and click Print.
The file should then print and your balance will be deducted.
Printing from Android device to student printers via EveryonePrint website
Your Android device must be connected to the college wifi network. For details see Eduroam
Check that you have enough credit in your student account at the Pcounter webpage:
Your Balance
When “Authentication Required” pcounter.itsligo.ie, appears log in with your S number & PC login password. Make a note of your balance for comparison in step 8.
Open the EveryonePrint website at EveryonePrint

Log in using the same username & password you would use to log in to a college PC e.g. s12345678 and your PC login password.
Once logged in you should see:
Browse to the file you would like to print, and click “Next”.
The filename should appear in your list as below, with status “Awaiting processing”, then “Processing” while the server converts it from Word / Excel etc. format to a printing format.
This may take some time.
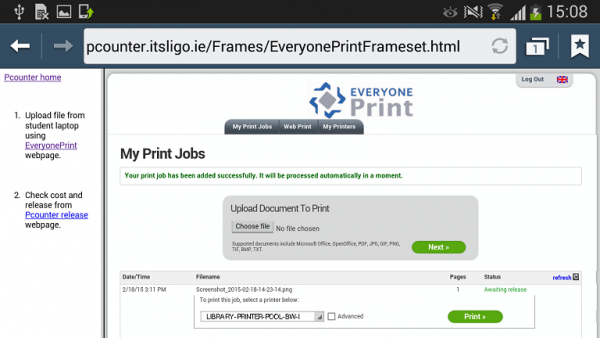
When the status of the print job changes to “Awaiting release”, choose a printer from the drop down list.
After choosing the printer, Click “Print” .
NOTE: A message will appear that “Your print job has been sent to the selected printer successfully.” and the print job will change to status “Printing” (as below).
Your file will not come out of the printer selected in 5 until you complete step 2 on the LHS of the screen below.
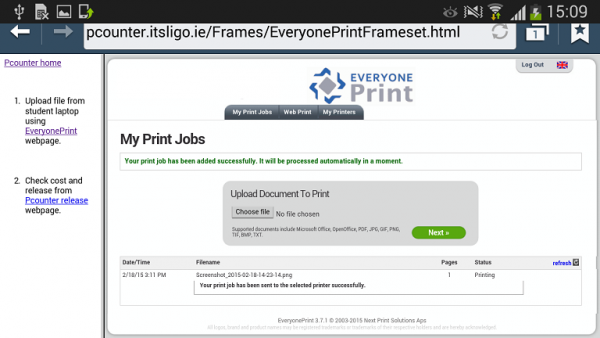
After logging in step ” 2. Pcounter release”, check your balance, the pagecount, cost and printer name before clicking Print to release the print job to the printer.